.
Модуль «Захват координат»
The coordinate capture plugin is easy to use and provides the ability to display coordinates on the map canvas for two selected coordinate reference systems (CRS).
Figure Coordinate Capture 1:
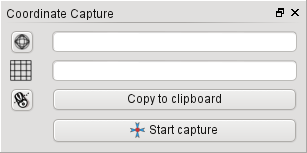
Coordinate Capture Plugin 
- Start QGIS, select
 Project Properties from the
Settings (KDE, Windows) or File (Gnome, OSX) menu
and click on the Projection tab. As an alternative, you can also
click on the
Project Properties from the
Settings (KDE, Windows) or File (Gnome, OSX) menu
and click on the Projection tab. As an alternative, you can also
click on the  CRS status icon in the lower
right-hand corner of the status bar.
CRS status icon in the lower
right-hand corner of the status bar. Отметьте пункт
 Включить преобразование координат «на лету» и выберите нужную систему координат проекта (см. также раздел Работа с проекциями).
- Activate the coordinate capture plugin in the Plugin Manager (see
The Plugins Dialog) and ensure that the dialog is visible by going to
View ‣ Panels and ensuring that
Coordinate Capture is enabled. The coordinate capture dialog
appears as shown in Figure figure_coordinate_capture_1. Alternatively,
you can also go to Vector ‣ Coordinate Capture and see
if Coordinate Capture is enabled.
Щелкните по кнопке
 Щелкните для выбора системы координат, используемой для вывода и выберите в диалоговом окне требуемую систему координат.
Для запуска захвата координат щелкните по кнопке [Начать захват]. Теперь вы можете щелкнуть в любом месте поля карты, и в модуле отобразятся координаты выбранного места в требуемой системе координат.
- To enable mouse coordinate tracking, click the
 mouse tracking
icon.
mouse tracking
icon. Также имеется возможность скопировать выбранные координаты в буфер обмена.