18.2. Lesson: Utiliser DB Manager pour travailler avec les Bases de données Spatiales dans QGIS
We have already seen how to perform many database operations with QGIS as well as with other tools, but now it’s time to look at the DB Manager tool which provides much of this same functionality as well as more management oriented tools.
L’objectif de cette leçon: Apprendre comment interagir avec des base de données spatiales en utilisant le DB Manager de QGIS.
18.2.1.  Follow Along: Administrer une Base de Données PostGIS avec DB Manager
Vous devez premièrement ouvrir l’interface DB Manager en sélectionnant Base de Données –> DB Manager –> DB Manager dans le menu ou en séelectionnant l’icone DB Manager dans la barre d’outils.

You should already see the previous connections we have configured and be able to expand the myPG section and its public schema to see the tables we have worked with in previous sections.
The first thing you may notice is that you can now see some metadata about the Schemas contained in your database.
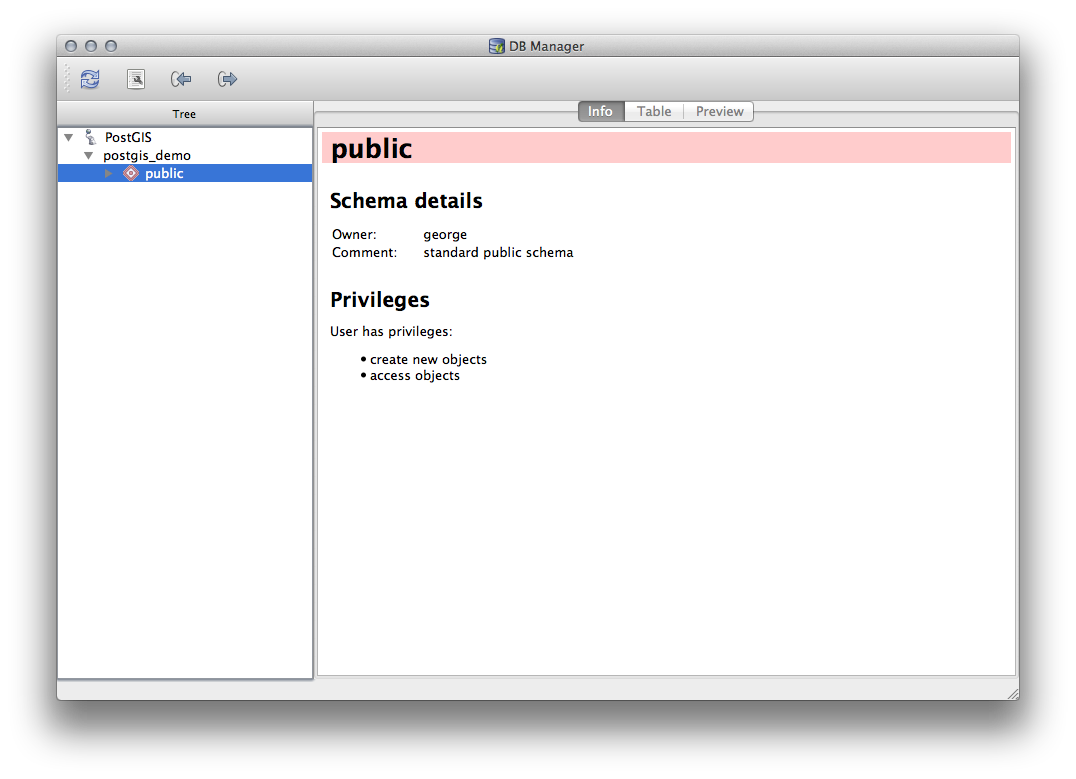
Schemas are a way of grouping data tables and other objects in a PostgreSQL database and a container for permissions and other constraints. Managing PostgreSQL schemas is beyond the scope of this manual, but you can find more information about them in the PostgreSQL documentation. You can use the DB Manager to create new Schemas, but will need to use a tool like pgAdmin III or the command line interface to manage them effectively.
DB Manager can also be used to manage the tables within your database. We have already looked at various ways to create and manage tables on the command line, but now lets look at how to do this in DB Manager.
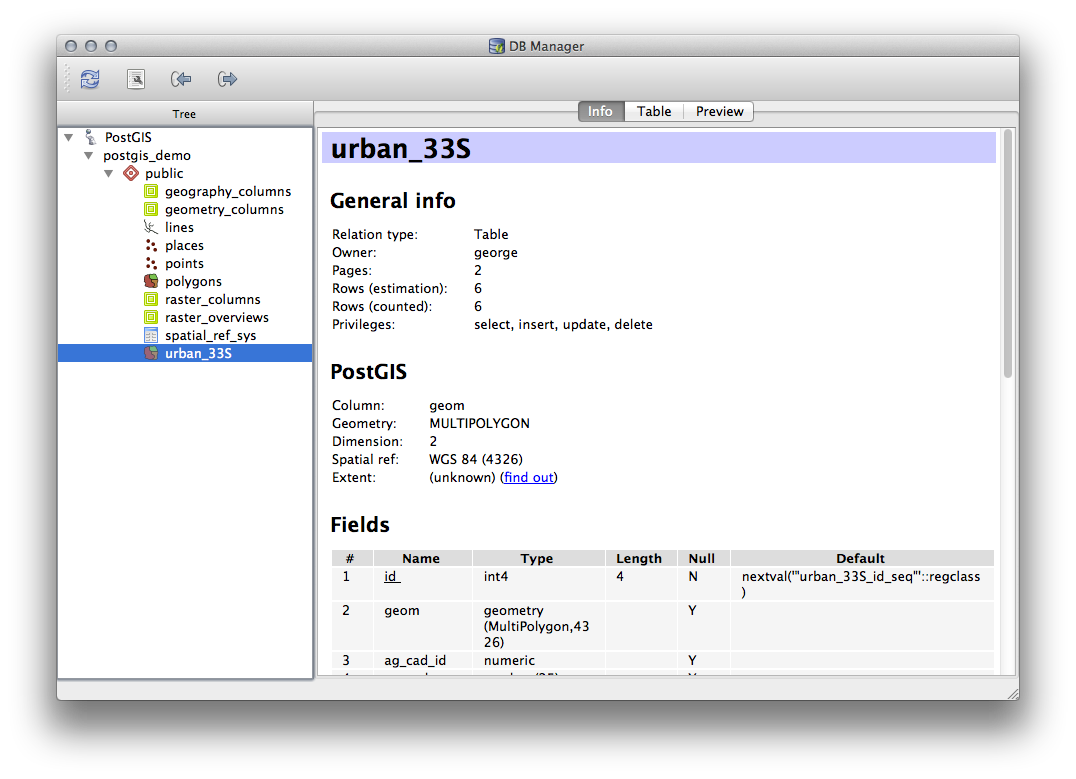
First, its useful to just look at a table’s metadata by clicking on its name in tree and looking in the Info tab.
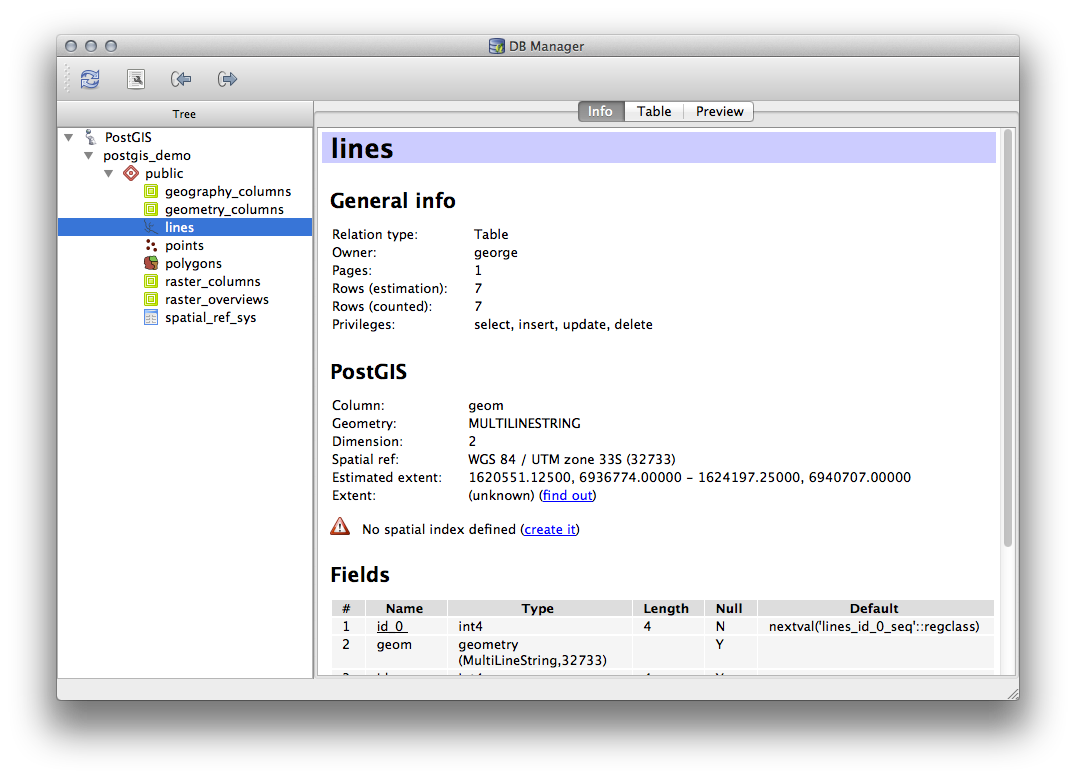
In this panel you can see the General Info about the table as well the information that the PostGIS extension maintains about the geometry and spatial reference system.
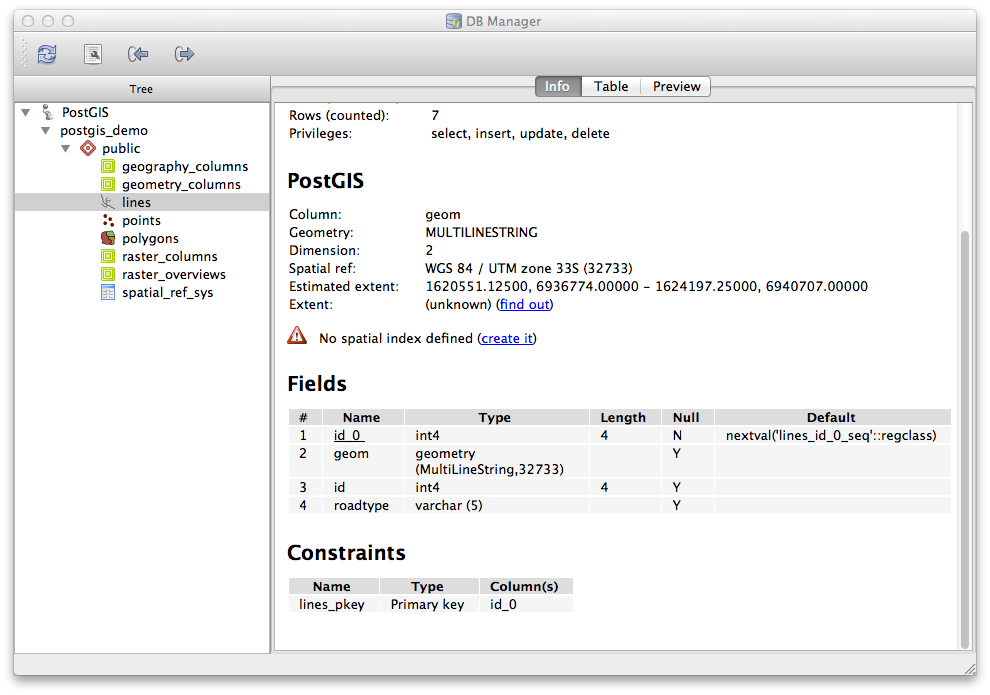
If you scroll down in the Info tab, you can see more information about the Fields, Constraints and Indexes for the table you are viewing.
Its also very useful to use DB Manager to simply look at the records in the database in much the same way you might do this by viewing the attribute table of a layer in the Layer Tree. You can browse the data by selecting the Table tab.
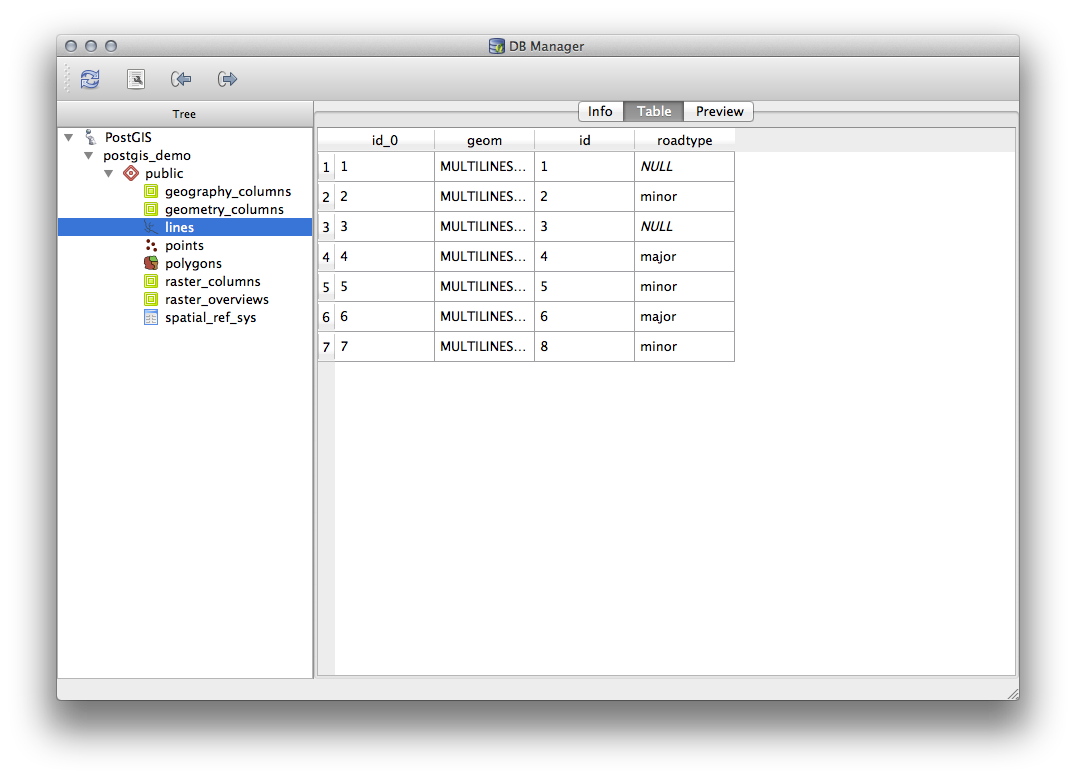
There is also a Preview tab which will show you the layer data in a map preview.
Clic droit sur une table dans l’arborescence puis clic sur Ajouter au Canevas ajoutera la table à votre carte.
So far we have only been viewing the database its schemas and tables and their metadata, but what if we wanted to alter the table to add an additional column perhaps? DB Manager allows you to do this directly.
Sélectionnez dans l’arborescence la table que vous souhaiter éditer.
Sélectionnez depuis le menu Table –> Editer une table afin d’ouvrir la fenêtre Propriétés de la table.
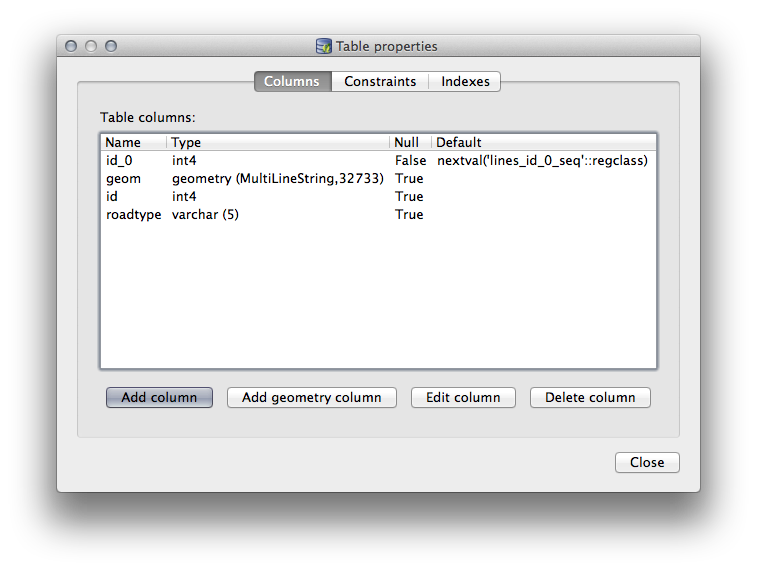
Vous pouvez utiliser cette fenêtre pour ajouter des colonnes, ajouter des colonnes géométriques, éditer des colonnes existantes ou supprimer complètement une colonne.
Dans l’onglet Contraintes, vous pouvez gérer quels champs sont utilisés comme clé primaire ou supprimer des contraintes existantes.

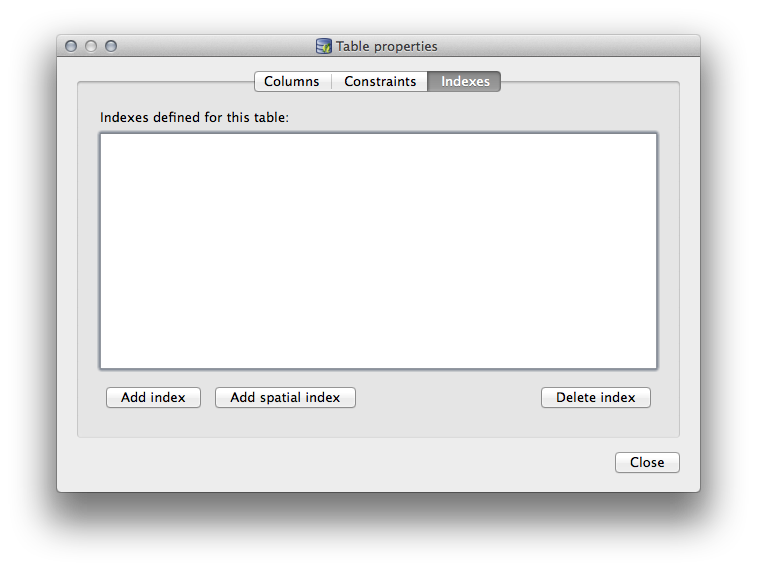
L’onglet Index peut être utilisé pour ajouter et supprimer des index aussi bien normaux que spatiaux.
18.2.2. Follow Along: Création d’une Nouvelle Table
Maintenant que nous avons vu comment travailler sur les tables existantes dans notre base de données, voyons comment créer une nouvelle table avec DB Manager.
Si elle n’est pas déjà ouverte, ouvrez la fenêtre de DB Manager et déroulez l’arborescence jusqu’à voir la liste des tables déjà présentes dans votre base de données.
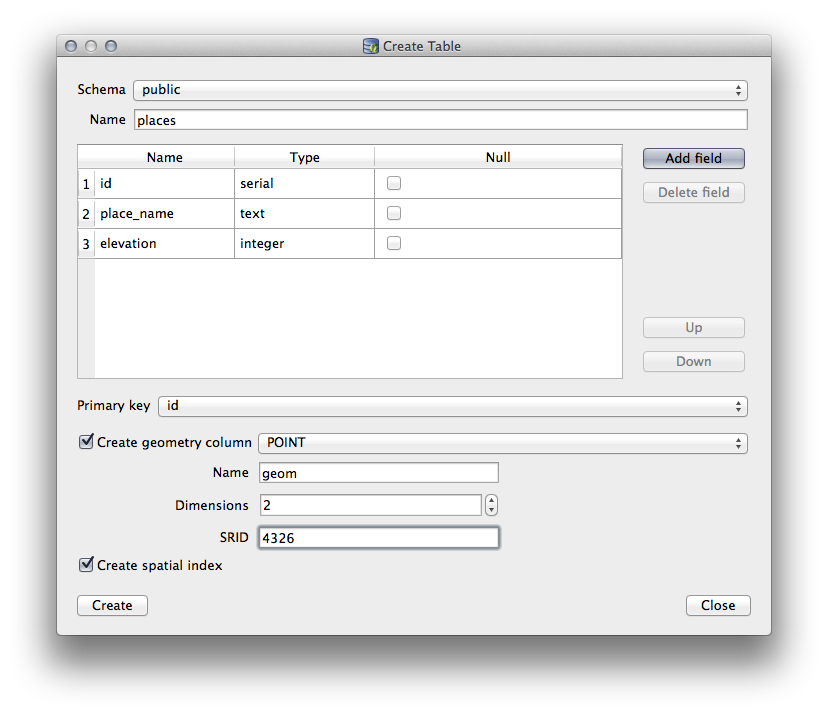
Depuis le menu, sélectionnez Table –> Créer une table pour afficher la fenêtre de création de table.
Utilisez le schéma par défaut Public et nommez la table places .
Ajoutez les champs id, place_name et elevation comme montré ci-dessous
Assurez-vous de définir le champ id comme clé primaire.
Cochez la case Créer une colonne géométrique et assurez-vous qu’il est défini de type POINT; laissez le nom geom et spécifiez 4326 comme SRID.
Cochez la case Créer un index spatial et cliquez sur Créer pour créer la table.
Validez la fenêtre vous faisant savoir que la table a été créée et cliquez sur:guilabel:Fermer pour fermer la fenêtre de création de table.
Vous pouvez maintenant inspecter votre table dans DB Manager et bien entendu, vous constaterez qu’elle ne contient aucune donnée. Désormais, vous pouvez ajouter votre table au projet, la Basculer en mode édition depuis le menu Couche et commencez à y ajouter des places.
18.2.3. Follow Along: Administration basique de base de données
DB Manager vous permet aussi de faire d’autres tâches basiques d’administration de base de données. Ce n’est certainement pas un substitut pour un outil complet d’administration de base de données, mais il vous fournit des fonctions de maintenance de votre base de données.
Database tables can often become quite large and tables which are being modified frequently can end up leaving around remnants of records that are no longer needed by PostgreSQL. The VACUUM command takes care of doing a kind of garbage collection to compact and optionall analyze your tables for better performance.
Voyons comment réaliser une commande VACUUM ANALYZE à partir de DB Manager.
Sélectionnez une de vos tables dans l’arborescence de DB Manager.
Sélectionnez menu Table –> Lancer Vacuum Analyze.
Ça y est! PostgreSQL va réaliser l’opération. Selon la taille de votre table, ceci peut prendre un certain temps.
You can find more information about the VACUUM ANALYZE process in the PostgreSQL Documentation
18.2.4. Follow Along: Exécution de requêtes SQL avec DB Manager
DB Manager also provides a way for you to write queries against your database tables and to view the results. We have already seen this type of functionality in the Browser panel, but lets look at it again here with DB Manager.
Sélectionnez la table lines dans l’arborescence.
Sélectionnez le bouton Fenêtre SQL dans la barre d’outils de DB Manager.

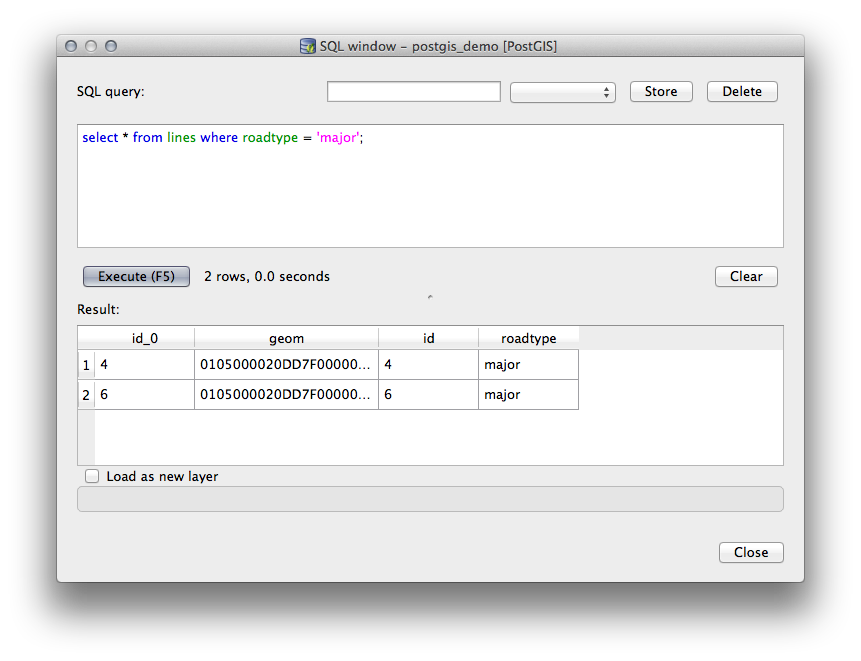
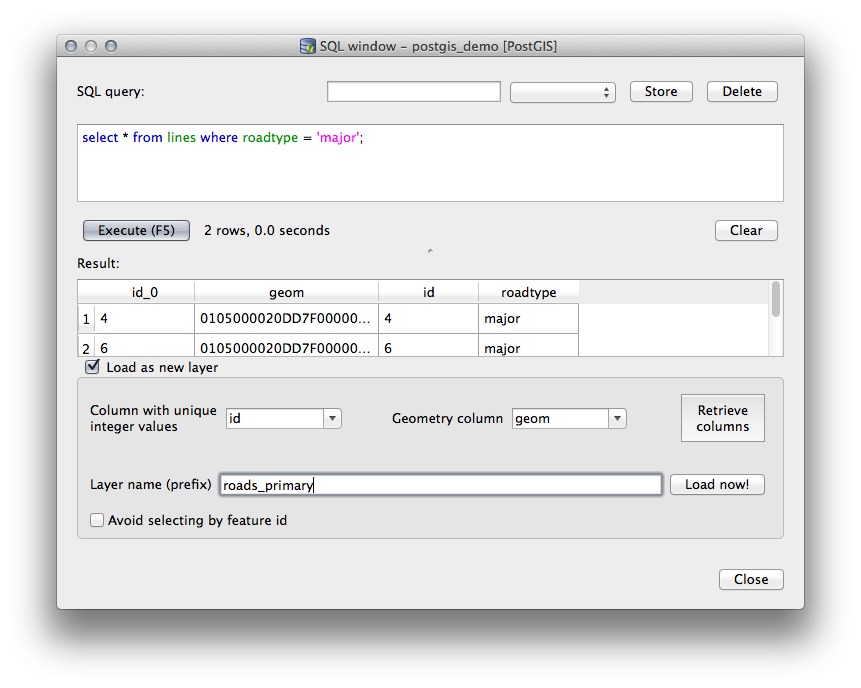
Composez la Requête SQL suivante dans l’espace disponible:
select * from lines where roadtype = 'major';
Cliquez sur le bouton Exécuter (F5) pour réaliser la requête.
Vous devriez maintenant voir les enregistrements correspondants dans le panneau Résultat.
Cochez la case Charger comme une nouvelle couche pour ajouter le résultat à votre carte.
Sélectionnez la colonne id en tant que Colonne avec des valeurs entières et uniques et la colonne geom en tant que Colonne de géométrie.
- Enter roads_primary as the Layer name (prefix).
- Click Load now! to load the results as a new layer into your map.
The layers that matched your query are now displayed on your map. You can of course use this query tool to execute any arbitrary SQL command including many of the ones we looked at in previous modules and sections.
18.2.5. Importing Data into a Database with DB Manager
We have already looked at how to import data into a spatial database using command line tools and also looked at how to use the SPIT plugin, so now lets learn how to use DB Manager to do imports.
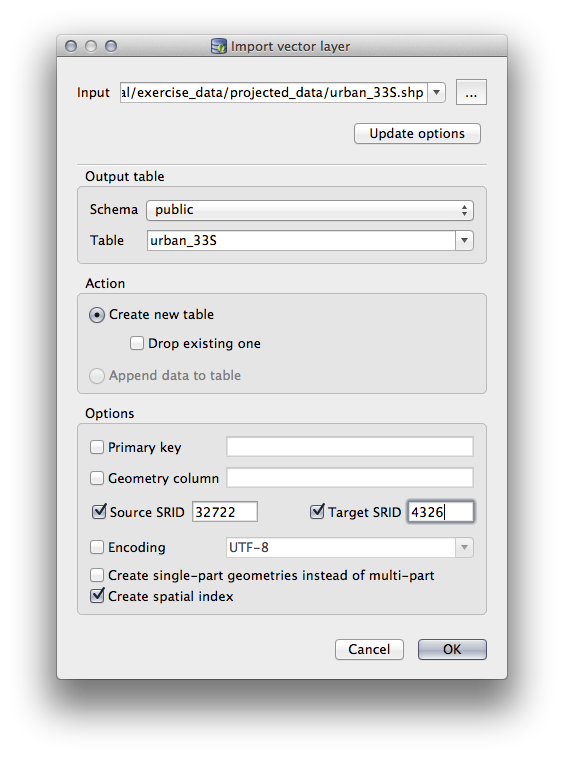
- Click the Import layer/file button on the toolbar in the DB Manager dialog.

- Select the urban_33S.shp file from exercise_data/projected_data as the input dataset.
- Click the Update Options button to pre-fill some of the form values.
- Make sure that the Create new table option is selected
- Specify the Source SRID as 32722 and the Target SRID as 4326.
- Enable the checkbox to Create Spatial Index
Cliquez sur OK pour réaliser l’import.
- Dismiss the dialog letting you know that the import was successful
- Click the Refresh button on the DB Manager Toolbar.
You can now inspect the table in your database by clicking on it in the Tree. Verify that the data has been reprojected by checking that the Spatial ref: is listed as WGS 84 (4326)
Right clicking on the table in the Tree and a selecting Add to Canvas will add the table as a layer in your map.
18.2.6. Exporting Data from a Database with DB Manager
Of course DB Manager can also be used to export data from your spatial databases, so lets take a look at how that is done.
- Select the lines layer in the Tree and click the Export to File button on the toolbar to open the Export to vector file dialog.
- Click the ... button to select the Output file and save the data to your exercise_data directory as urban_4326.
- Set the Target SRID as 4326.
- Click OK to initialize the export.
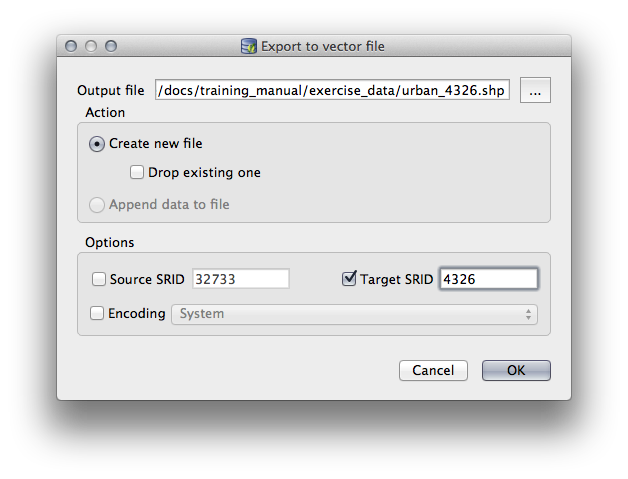
- Dismiss the dialog letting you know the export was successful and close the DB Manager.
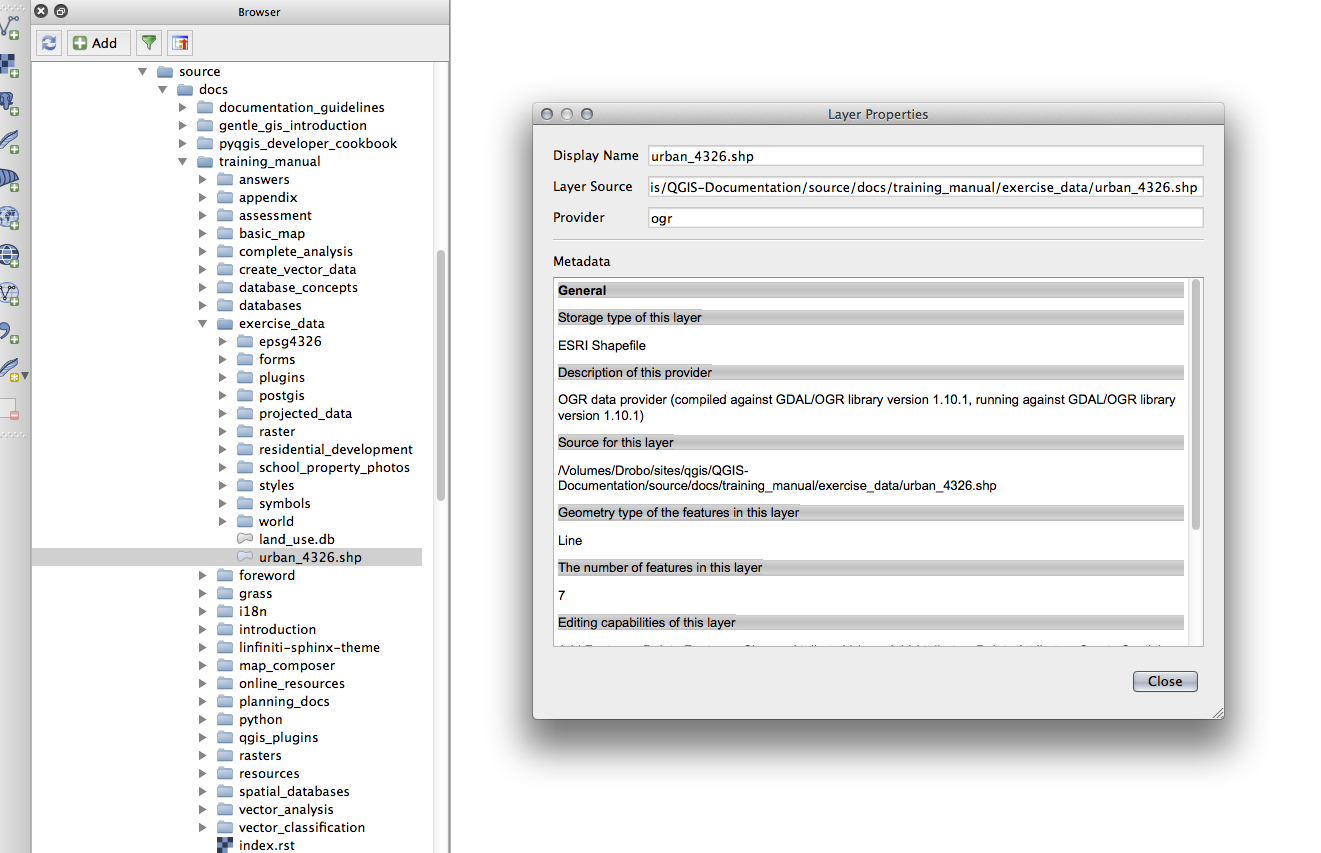
You can now inspect the shapefile you created with the Browser panel.
18.2.7. In Conclusion
You have now seen how to use the DB Manager interface in QGIS to Manage your spatial databases, to execute sql queries against your data and how to import and export data.
18.2.8. What’s Next?
Next, we will look at how to use many of these same techniques with spatialite databases.